The Ultimate Guide to Hooking Up Your Own Garage Door Opener
How to Install a Garage Door Opener by Yourself (And Actually Get It Right)
Learning how to install a garage door opener by yourself is more achievable than most homeowners expect. Here's a quick overview of what the process involves:
- Choose your opener- Pick the right drive type and motor power for your door
- Assemble the rail- Connect the rail sections and attach the trolley
- Mount the header bracket- Centered above the door, two inches above the highest point
- Install the motor unit- Secure to ceiling joists, slightly angled downward toward the motor
- Connect the door arm- Attach the trolley arm to the door bracket
- Wire the system- Connect safety sensors, wall control, and power
- Program and test- Set travel limits, program remotes, and test the safety reversal
Installing a new garage door opener is one of those weekend projects that pays off fast. Most homeowners can complete it in 4 to 6 hours — and doing it yourself instead of hiring out can save you anywhere from $200 to $400 compared to professional installation costs.
That said, it's not without its challenges. There are real safety risks, a few steps that trip up even experienced DIYers, and at least one part of the job — torsion spring adjustment — that should always be left to a professional.
This guide walks you through the entire process clearly and honestly, so you know exactly what you're getting into before you pick up a drill.

Preparation, Safety, and Choosing the Right Opener
Before we start turning wrenches, we need to make sure you have the right gear. Not all garage door openers are created equal, and picking the wrong one for your specific door in the Shenandoah Valley can lead to a noisy, short-lived investment.
When you're looking at how to install garage door opener by yourself, the first decision is the drive type. This is the mechanism that actually moves the trolley along the rail.
- Chain Drive: These are the "old reliable" of the industry. They are budget-friendly and very durable, making them great for detached garages. However, they are noisy. If your bedroom is right above the garage, you might want to reconsider.
- Belt Drive: These use a rubber-reinforced belt. They are incredibly quiet and smooth. While they cost a bit more upfront, they require less maintenance than chains and are the gold standard for attached homes.
- Screw Drive: These use a threaded steel rod to move the trolley. They have fewer moving parts, but they can be sensitive to the extreme temperature shifts we sometimes see in Virginia, as the metal rod expands and contracts.
- Direct Drive: A modern marvel where the motor itself travels along a stationary chain or rail. These are nearly silent and vibration-free.
Drive Type Comparison Table
| Feature | Chain Drive | Belt Drive | Screw Drive |
|---|---|---|---|
| Noise Level | High | Very Low | Moderate |
| Price | $ | $$$ | $$ |
| Maintenance | Regular Lubrication | Low | Minimal |
| Best For | Detached Garages | Attached Garages | Moderate Climates |
Critical Safety Warnings
We cannot stress this enough: do not touch the garage door springs. Whether you have a torsion spring (the big coil above the door) or extension springs (along the side tracks), they are under massive tension. According to industry safety standards, adjusting these is a job for pros. If your door doesn't stay open halfway when disconnected from the opener, it is out of balance. Stop and call us for Residential Services before proceeding with the opener install.
Essential Tools for How to Install Garage Door Opener by Yourself
You likely have most of these in your Harrisonburg or Staunton home already. Gather them before you start:
- Socket set and wrenches: For tightening the heavy-duty bolts.
- Stepladder: Essential for reaching the ceiling joists.
- Power drill and bits: To pilot holes into the wooden header and joists.
- Wire strippers: For connecting the safety sensors and wall button.
- Level: To ensure the rail and motor unit are aligned correctly.
- Safety gear: Goggles and gloves are non-negotiable.
- Circuit tester: To ensure you aren't working on live wires.
Selecting the Correct Motor Power
Size matters here. If you buy an underpowered motor, it will burn out trying to lift a heavy door.
- 1/2 HP: The standard for most single-car aluminum or steel doors.
- 3/4 HP: Recommended for double-car doors, heavy wooden doors, or heavily insulated "carriage house" style doors common in the Waynesboro area.
- 1 HP+: Reserved for the heaviest industrial or oversized residential doors.
Step-by-Step Guide: How to Install Garage Door Opener by Yourself

Now that the prep is done, let's get to work. Most modern kits come with the rail in several pieces to make shipping easier.
- Assemble the Rail: Lay the rail sections out on the garage floor. Slide them together until they click or bolt into place.
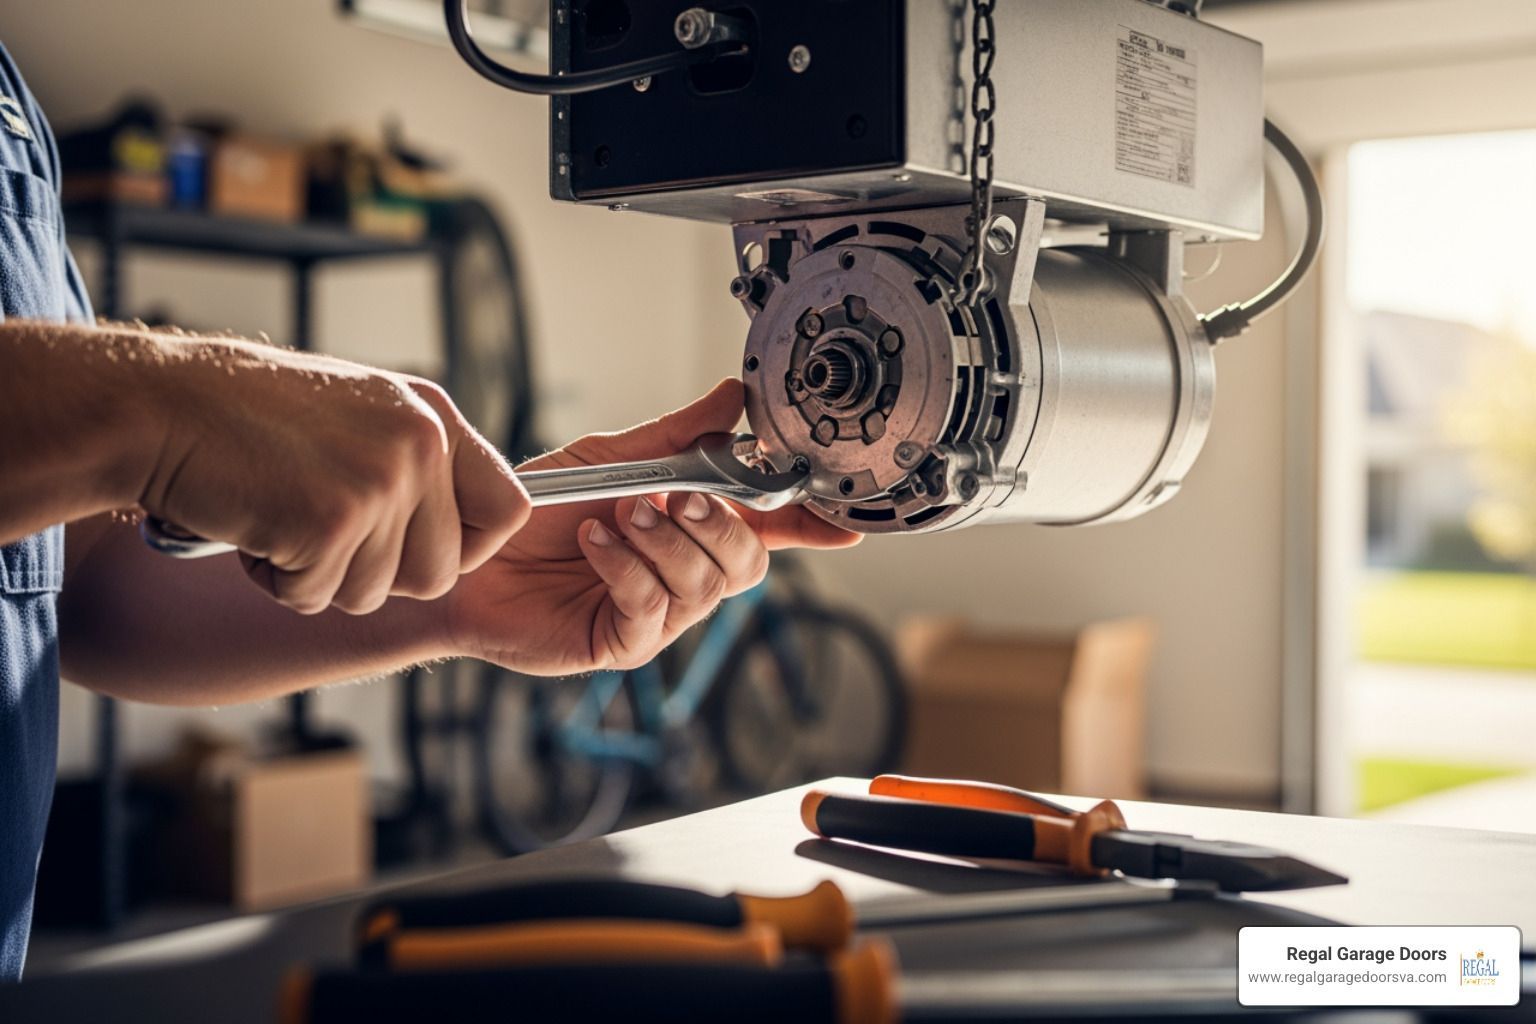
- Attach the Rail to the Motor: Slide the rail into the motor unit and secure it with the provided brackets.
- Install the Trolley: Slide the trolley onto the rail. This is the piece that will eventually pull your door up.
- Install the Drive (Chain or Belt): Wrap the chain or belt around the idler pulley at the end of the rail and the sprocket on the motor. Tighten it according to the manual—usually until it hangs about a quarter-inch above the rail.
For a great visual walkthrough of this specific assembly phase, check out this Garage Door Opener Installation video.
Mounting the Motor and Rail System
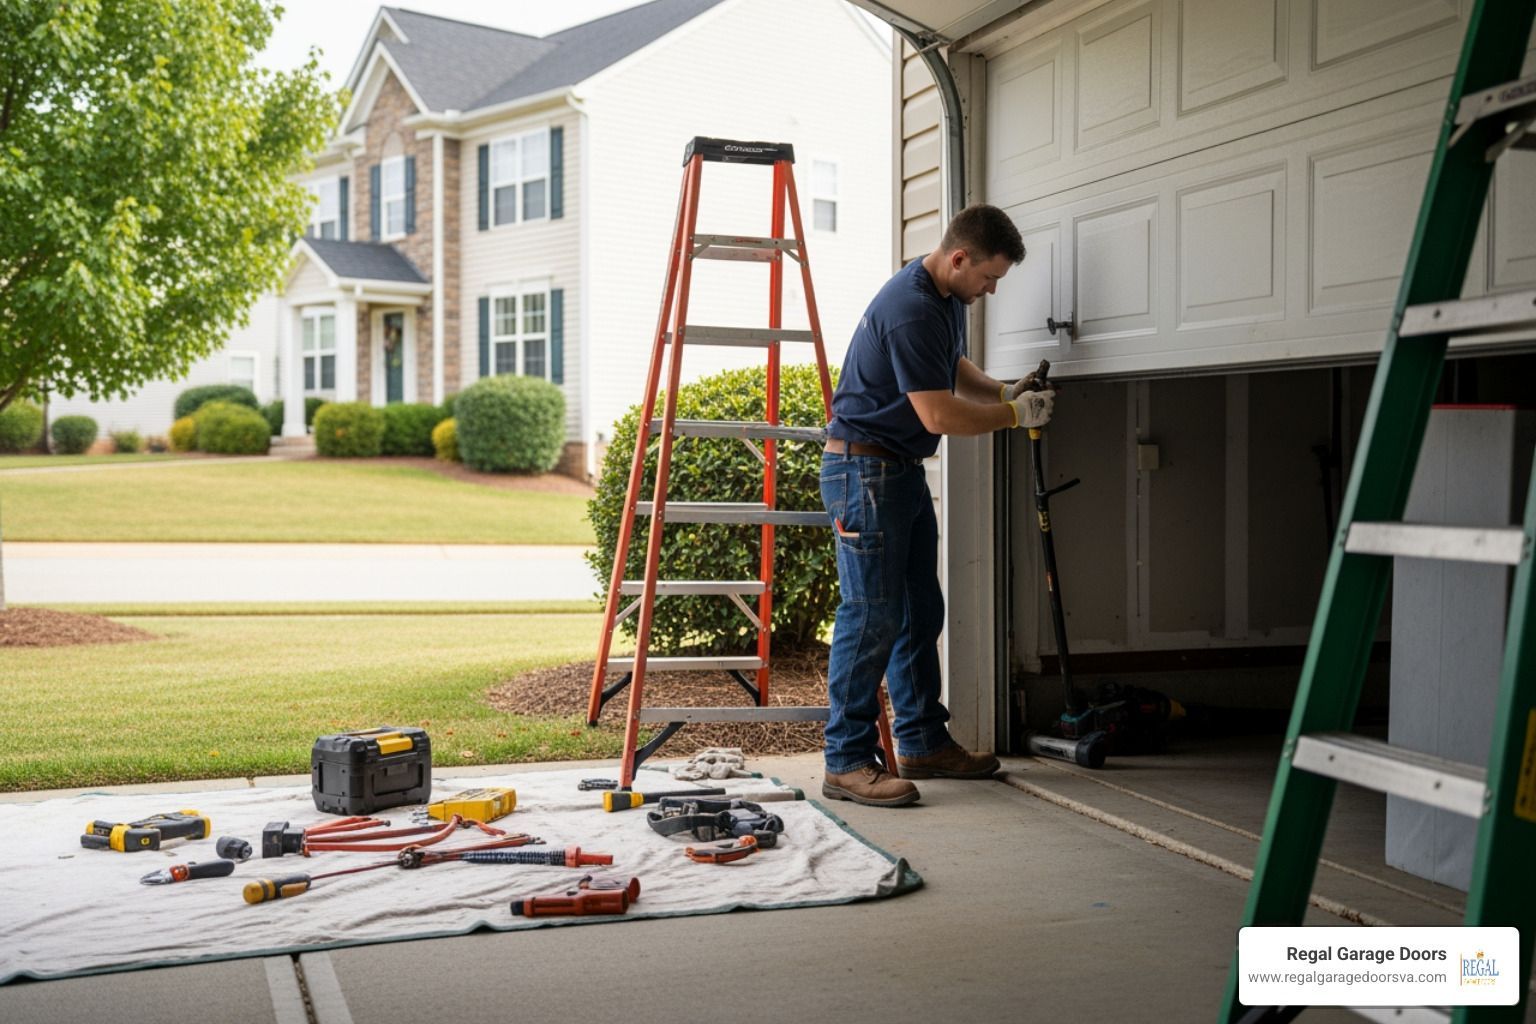
This is where an assistant comes in handy. You’ll need to lift the heavy motor unit while someone else steadies the ladder.
- The Header Bracket: Mark the center of your garage door. Open the door to its highest point of travel and mark that height on the wall above the door. Mount your header bracket about 2 inches above that mark. This ensures the door won't hit the rail as it opens.
- Ceiling Joists: You must mount the motor to solid wood. Do not simply screw it into the drywall. Use a stud finder to locate the ceiling joists. If the joists don't line up with your motor, you can screw a 2x4 "bridge" across two joists and then mount the opener to that bridge.
- Rail Slope: A common pro tip is to have the rail slope slightly downward toward the motor unit. This helps ensure the door clears the rail smoothly during the closing cycle.
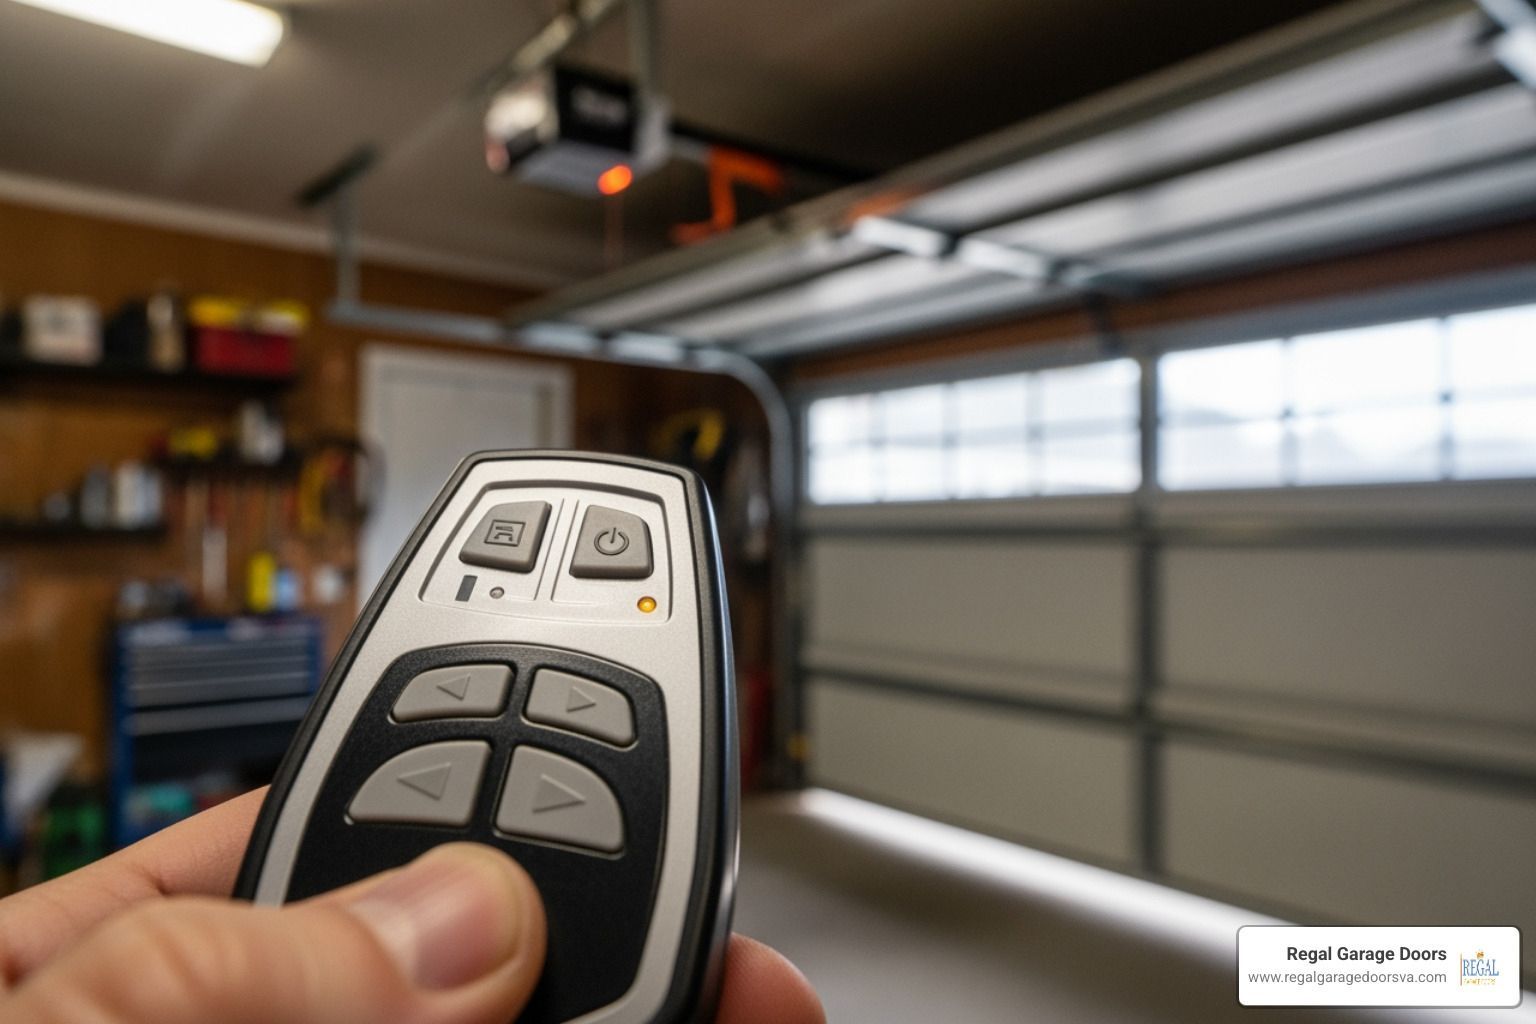
Wiring and Programming Your New Opener
Once the motor is hanging, it’s time to give it "eyes" and "ears."
- Safety Sensors: These must be mounted no higher than 6 inches off the floor on either side of the door. They "talk" to each other via an infrared beam. If that beam is broken, the door won't close. Run the wires up the wall and along the ceiling to the back of the motor.
- Wall Control: Mount this at least 5 feet off the ground so small children can't reach it. Wire it back to the motor unit.
- Power: Most openers plug into a standard 120V outlet in the ceiling. If you don't have one, you'll need an electrician to install it.
- Programming: Follow the Home Depot guide or your manual to set the "Travel Limits." This tells the motor exactly where "fully open" and "fully closed" are.
Final Testing: How to Install Garage Door Opener by Yourself Successfully
You aren't finished until you've verified the safety features.
- The 2x4 Test: Place a piece of 2x4 wood flat on the ground where the door closes. Close the door. When it hits the wood, it should reverse immediately. If it doesn't, your "Force Settings" are too high.
- Sensor Test: While the door is closing, wave a broom in front of the safety sensors. The door should stop and reverse.
- Manual Release: Pull the red emergency cord. You should be able to lift and lower the door easily by hand. If it's heavy or crashes down, your springs need professional attention.
Troubleshooting and Common Installation Mistakes
Even the best DIYers run into hiccups. If your door is acting up, check these common culprits:
- Sensor Misalignment: This is the #1 cause of "the door won't close." If the tiny LEDs on the sensors are flickering, they aren't looking directly at each other. Give them a slight nudge until the lights stay solid.
- Jerky Movement: This usually means the rail isn't level or the door itself needs lubrication. Use a silicone-based garage door spray on the rollers and hinges.
- The "Off-Center" Pull: If you didn't mount the header bracket exactly in the center of the door, the trolley will pull at an angle, which can eventually warp your door or burn out the motor.
- Loose Chain: A chain that's too loose will slap against the rail, causing a terrible clanging noise. Tighten it until it has just a little bit of "give."
If you find yourself stuck, we have experience in how garage door opener repairs are handled in Staunton VA , and we're happy to help troubleshoot.
When to Skip the DIY and Call a Professional
While we love empowering homeowners to handle their own maintenance, some situations are genuinely dangerous or require specialized tools.
- Spring Issues: As mentioned, never touch the torsion springs. If you see a gap in the coil, the spring is broken.
- Electrical Wiring: If your garage isn't wired for an opener, don't try to "daisy chain" extension cords. You need a dedicated outlet.
- Structural Changes: If you have a very low ceiling and need a "side-mount" or "jackshaft" opener, the installation is significantly more complex.
- Heavy Custom Doors: Large wooden carriage doors can weigh hundreds of pounds and require precise calibration.
If you're in Waynesboro or the surrounding areas, our team specializes in Garage Door Installation in Waynesboro VA to ensure your heavy or complex doors are handled safely.
Frequently Asked Questions about How to Install Garage Door Opener by Yourself
How long does it take to install a garage door opener?
For a first-timer, expect to spend 4 to 6 hours. This includes unboxing, assembly, mounting, wiring, and the inevitable "where did I put that wrench?" moments. A professional can usually do it in 2 to 3 hours because we've seen every possible joist configuration and wiring quirk already!
Can I use my old rails with a new opener?
We strongly recommend against this. Every manufacturer designs their rails and trolleys to work as a specific system. Even if the old rail looks similar, using it can void your warranty, lead to premature wear on the new motor, or cause safety sensors to malfunction. Most new openers come with a rail anyway—use the new one for a fresh start.
Do I need an electrical permit for this installation?
If you are simply plugging the new opener into an existing ceiling outlet, you generally do not need a permit. However, if you are running new electrical lines or installing a new circuit breaker to power the garage, local codes in Augusta County or Charlottesville may require a permit and an inspection by a licensed electrician.
Conclusion
Successfully learning how to install garage door opener by yourself is a great way to boost your home's security and convenience while saving some serious cash. By following the steps above—and respecting the power of those springs—you can have a smooth-running door by dinner time.
To keep your new opener running for years to come:
- Lubricate twice a year: Use a high-quality silicone spray on the rail and hinges.
- Test the balance: Once a year, pull the release cord and make sure the door stays put when halfway open.
- Wipe the sensors: Dust and spiderwebs can block the safety beam.
If you hit a snag or decide that spending your Saturday on a ladder isn't for you, Regal Garage Doors is here to help. We provide local expertise from Stoneburner with code-compliant installs and transparent quotes throughout the Shenandoah Valley.
Whether you need a hand with the final programming or a full professional installation, Contact us today. You can also find more info about residential services on our website to see how we can make your home safer and more accessible. Happy DIYing!