The Complete Guide to Installing New Garage Door Springs
Why Installing New Garage Door Springs Is Harder (and More Dangerous) Than It Looks
Installing new garage door springs is one of the most high-stakes repairs a homeowner can attempt. Here's a quick overview of what the process involves:
Quick Answer: How to Replace Garage Door Torsion Springs
- Disconnect the garage door opener and clamp the tracks
- Unwind the old springs using proper 18-inch winding bars
- Measure the old springs (length, wire size, inside diameter, wind direction)
- Slide off the old springs and install the correctly matched replacements
- Wind the new springs — 30 quarter-turns for 7-foot doors, 34 for 8-foot doors
- Stretch each spring 1/8 to 1/4 inch after winding
- Test door balance by lifting it manually to the halfway point — it should stay put
- Lubricate with silicone-based lubricant and reconnect the opener
Your garage door is likely the heaviest moving object in your home, often weighing 200 to 300 pounds. The springs are what make lifting it feel effortless. When they fail, the whole system grinds to a halt.
The problem? These springs operate under enormous tension. A snapped spring or a slipping winding cone can send metal flying — fast. Injuries from DIY spring repairs range from stitches to broken bones, and worse.
That's not meant to scare you off. It's meant to make sure you go in with your eyes open.
This guide covers everything you need to know — from identifying your spring type, to safely unwinding old springs, to winding and balancing new ones. Whether you're a confident DIYer weighing your options or a homeowner trying to understand what a technician will do, you're in the right place.
Understanding Your System: Torsion vs. Extension Springs
Before you even think about ordering parts or grabbing a wrench, we need to identify exactly what kind of system you have. Most residential homes in the Shenandoah Valley, from Harrisonburg to Waynesboro, use one of two types of springs.
Identifying Your Current Setup
Torsion Springs: These are the most common in modern homes. You will find them mounted on a metal rod (the torsion shaft) directly above the garage door opening. When the door closes, cables attached to the bottom corners pull on drums at the ends of the shaft, winding the springs and storing energy. When you open the door, that energy is released to help lift the weight.
Extension Springs: You’ll find these on older doors or in garages with low headroom. They run horizontally along the upper tracks on both sides of the door. As the door closes, these springs stretch out (extend) to store energy. Because they can snap and fly across the room like a giant rubber band, they must have safety cables running through the center of the coils.
If you aren't sure which one you have, look at the wall above your door. If there’s a big metal bar with one or two tightly coiled springs on it, you’re looking at a torsion system. For more technical details on how these are rated, you can view this Replacement Spring Information guide.
Signs You Need to Be Installing New Garage Door Springs
How do you know it's time to replace them? Usually, the spring will let you know with a sound like a gunshot. If you were away when it happened, look for these signs:
- A Visible Gap: Torsion springs usually break in one spot, leaving a 1-to-2-inch gap between the broken halves.
- The Door is Too Heavy: If you try to lift the door manually and it feels like it’s made of lead, the springs aren't doing their job.
- The Opener Struggles: You might hear your opener straining or see the door move only a few inches before reversing.
- Crooked Door: If an extension spring breaks on one side, the door will pull unevenly, appearing tilted in the tracks.

If you notice these issues, it’s a clear signal that the system is failing. Check out these 6 obvious signs your garage door needs repair in Staunton VA for more diagnostic tips.
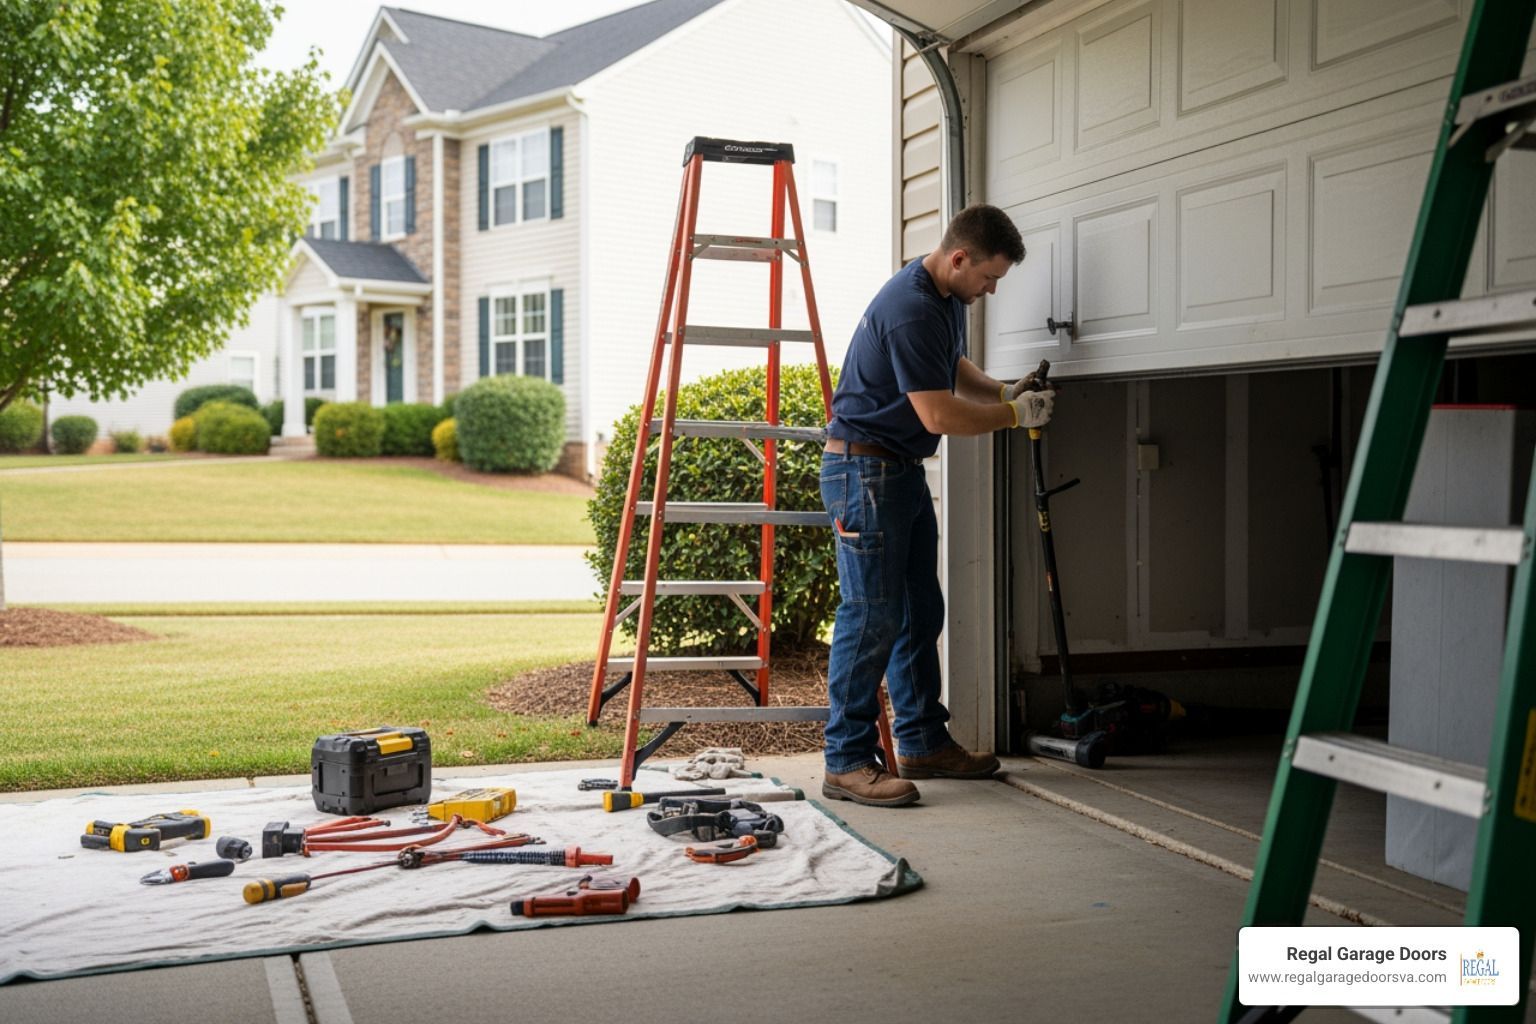
Safety First: Risks and Required Tools
We cannot stress this enough: installing new garage door springs is dangerous. The tension in a fully wound spring is enough to break an arm or cause severe facial injuries. In fact, a slip of a winding bar can lead to an emergency room bill that far exceeds the cost of professional repair.
One famous account of the risks involved is titled “How I Replaced Deadly Garage Door Torsion Springs and Lived to Tell the Tale.”. It serves as a sobering reminder of why professional tools and extreme caution are non-negotiable.
Essential Tools for Installing New Garage Door Springs
To do this job safely, you need the right gear. Never use screwdrivers, pliers, or rebar as winding bars. They can slip out of the winding cone holes with lethal force.
- Winding Bars: You need two 18-inch hardened steel bars, typically 1/2" or 5/8" in diameter depending on your cones.
- Vise Grips (Locking Pliers): You’ll need two pairs to lock the torsion shaft and the door tracks.
- Adjustable Wrench: To loosen and tighten the set screws.
- Tape Measure: For precise spring measurements.
- A File: To smooth out any burrs on the torsion shaft caused by the set screws.
- Silicone-Based Lubricant: To keep the new springs running quietly.
Critical Safety Precautions
- Unplug the Opener: You don't want anyone accidentally hitting the remote while your hands are near the springs.
- Clamp the Tracks: Use your vise grips on the vertical tracks just above the rollers. This prevents the door from "shooting up" unexpectedly when you add tension to the new springs.
- Stand to the Side: When winding or unwinding, never stand directly in front of the winding bars. If a bar slips, you want it to fly past you, not into you.
- Full Insertion: Always ensure the winding bar is fully seated in the hole of the winding cone. Many pros mark their bars with tape to visually confirm they are inserted all the way.
Step-by-Step Guide to Installing New Garage Door Springs
Measuring and Ordering the Correct Springs
At least 10% of garage doors have the wrong springs installed. If you order the wrong size, the door won't balance, which can burn out your opener or make the door dangerous to operate. We recommend measuring the unbroken spring if possible, or both halves of the broken one.
1. Wire Size: Use the "20-coil" or "40-coil" method. Measure the length of 20 coils in inches (do not include the cones). For example, if 20 coils measure 4.5 inches, your wire size is 0.225. 2. Inside Diameter (ID): This is usually 1.75 inches or 2 inches. It’s often stamped on the winding cone. 3. Length: Measure the length of the spring from the first coil to the last. Note: torsion springs "grow" in length when wound, so measure the relaxed length. 4. Wind Direction: This is where many DIYers get confused.
- Right-Wind Springs typically have Red cones and are usually installed on the Left side of the center bracket (looking from inside the garage).
- Left-Wind Springs typically have Black cones and are usually installed on the Right side.
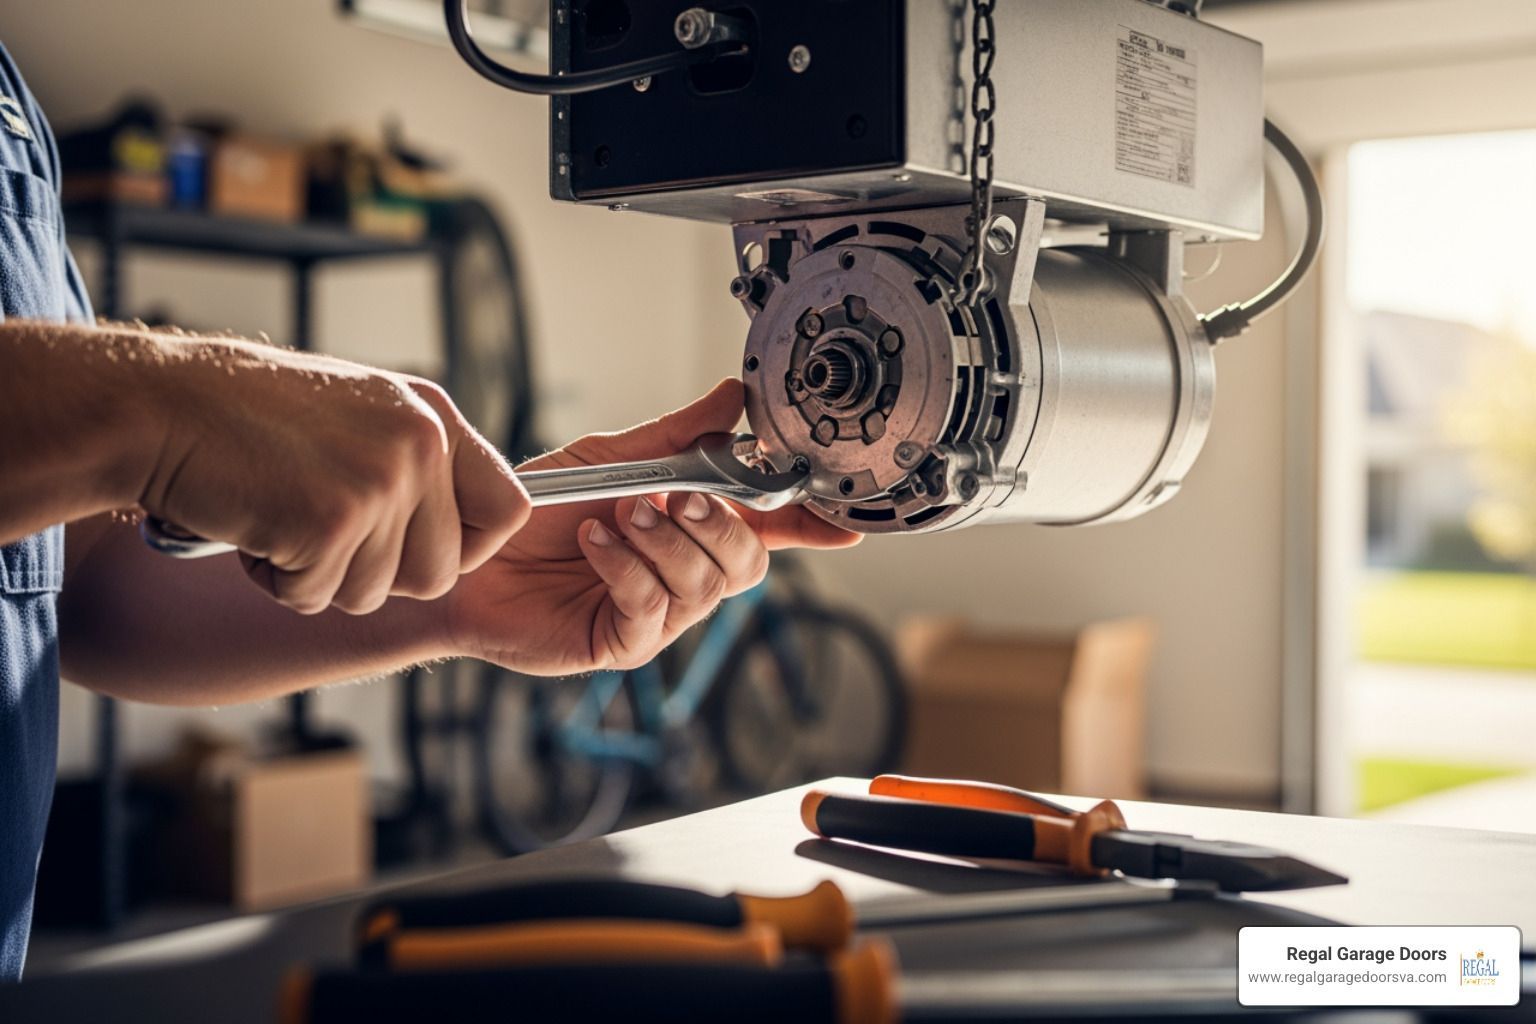
Removing Old Springs and Installing New Ones
Once you have your new parts, it's time to get to work.
- Release Tension: Insert a winding bar into the winding cone of the unbroken spring. Hold it firmly, loosen the set screws, and carefully unwind it one quarter-turn at a time. Always keep one bar in the cone until all tension is gone.
- Loosen the Hardware: Once the tension is out of both springs, loosen the bolts on the center stationary cones and the cable drums at the ends of the shaft.
- Slide the Shaft: Slide the torsion shaft to one side to remove the old springs and drums. This is a great time to inspect your center bearing. If it’s rough or worn, replace it now—it's a $15 part that saves a lot of future headaches.
- Install New Springs: Slide the new springs onto the shaft, ensuring the wind direction matches the side they are on. Reinstall the drums and the center bracket.
Winding and Stretching the New Springs
This is the most critical part of installing new garage door springs.
| Door Height | Quarter-Turns Needed | Full Turns |
|---|---|---|
| 7-Foot Door | 30 | 7.5 |
| 8-Foot Door | 34 | 8.5 |
Winding Process: Using your two winding bars, wind the spring upward. Count your quarter-turns carefully. Once you reach the required number (e.g., 30 for a standard 7-foot door), keep the bar in place.
The "Stretch": Before tightening the set screws, pull the spring away from the center bracket about 1/4 inch. This "stretch" prevents the coils from binding against each other as the spring expands during operation. Tighten the set screws until they touch the shaft, then add another 1/2 to 3/4 turn. Be careful not to over-tighten, as you can crush or distort the hollow torsion tube.
Post-Installation: Testing, Balance, and Maintenance
After the springs are wound and the set screws are tight, it's time to see if we got it right.
Checking Door Balance and Reconnecting the Opener
Remove the clamps from the tracks and the vise grips from the shaft. Manually lift the door about three feet off the ground.
- Perfect Balance: The door should stay in place without moving up or down.
- Too Strong: If the door flies up on its own, the springs are over-wound or too large.
- Too Weak: If the door drops to the floor, you may need another quarter-turn or a larger spring.
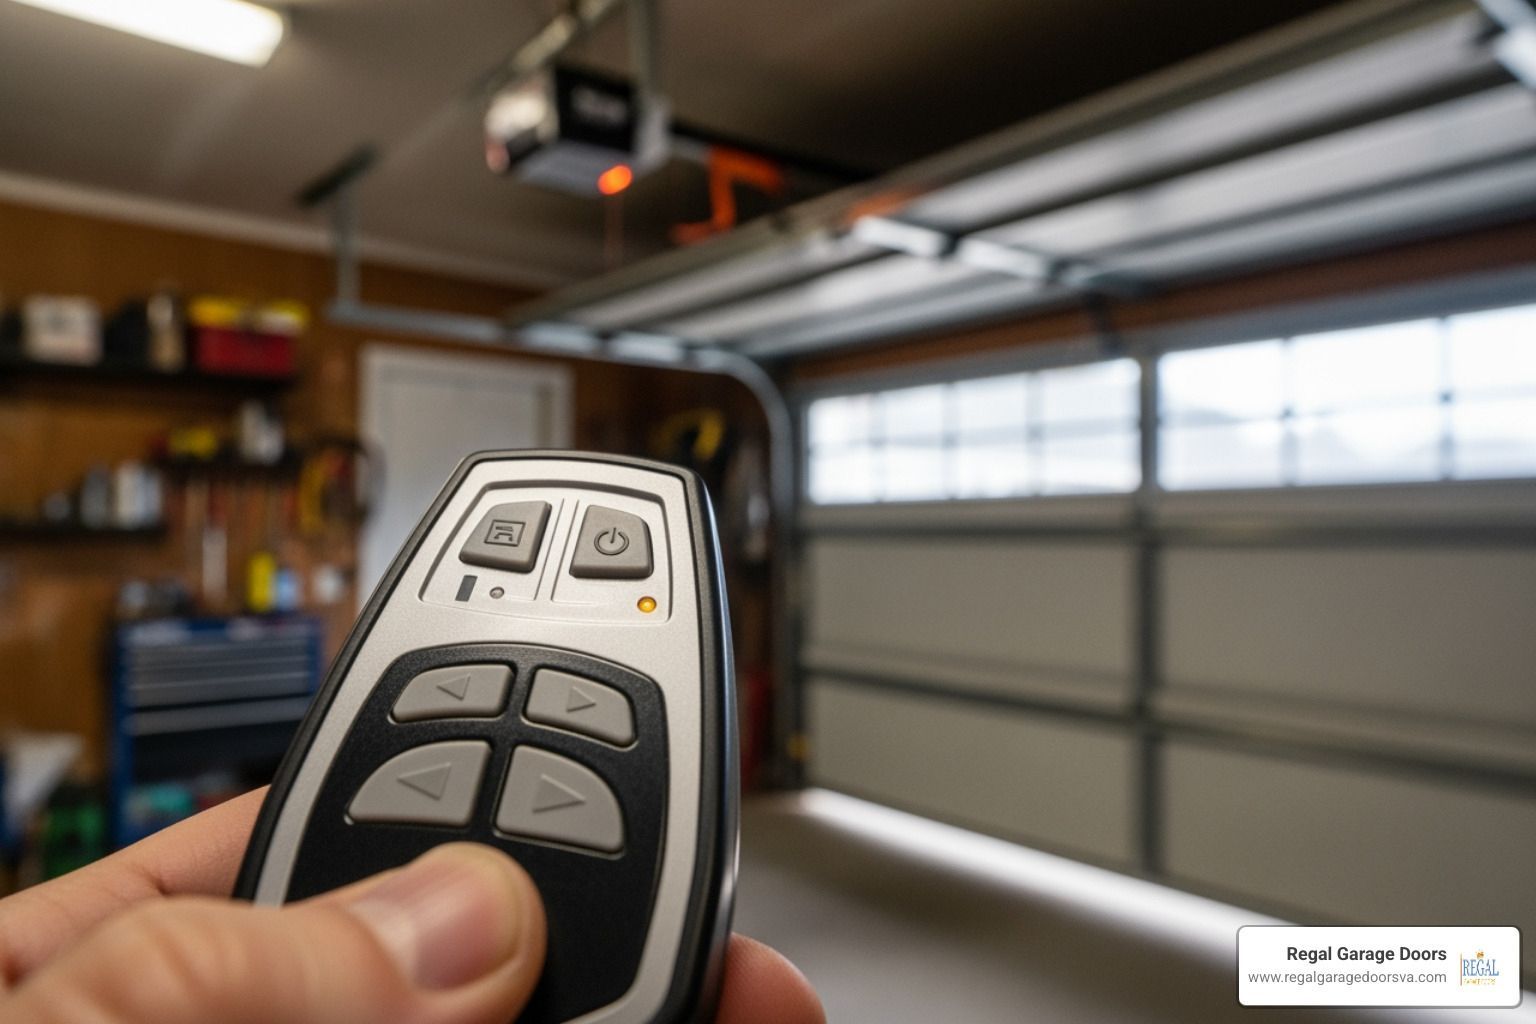
Once balanced, reconnect your opener. You may need to adjust the travel limits or force settings, as the new springs will have different tension than the old, worn-out ones. For residents in our service area, we explain how garage door opener repairs are handled in Staunton VA to help you understand the calibration process.
Our team at Regal Garage Doors provides comprehensive residential services to ensure your door is not just working, but operating at peak safety standards.
Maintenance Tips for New Springs
New springs can last anywhere from 7,000 to 20,000 cycles (one cycle is one open and one close). To get the most out of your investment:
- Lubricate Regularly: Every 3 to 6 months, apply a thin coat of silicone-based garage door lubricant to the coils. This reduces friction between the coils and prevents rust. Avoid using WD-40, as it is a degreaser, not a long-term lubricant.
- Monthly Inspections: Look for signs of wear or rust. If you live in wetter areas like Weyers Cave or Fishersville, rust can shorten a spring's life significantly.
- Keep Tracks Clean: Dirt in the tracks makes the door harder to move, putting unnecessary strain on your new springs.
Frequently Asked Questions about Installing New Garage Door Springs
How much does it cost to replace garage door springs?
The national average for professional replacement is between $200 and $300 for two springs, including parts and labor. While you can save on labor by doing it yourself, you’ll still need to buy the springs (approx. $60-$100) and proper winding bars ($25). Given the risks, many homeowners find the professional fee to be a bargain for the peace of mind it provides.
Can I use a screwdriver instead of winding bars?
No. This is perhaps the most dangerous mistake a DIYer can make. Screwdrivers are not designed to hold the torque of a garage door spring. They can easily slip out or snap, leading to catastrophic injury. Always use professional 18-inch hardened steel winding bars.
When should I call a professional for spring replacement?
You should call us if:
- You don't have the correct tools (especially winding bars).
- Your door uses a non-standard system like Wayne Dalton Torquemaster.
- The torsion shaft is rusted or the drums are damaged.
- You aren't 100% confident in your ability to handle high-tension components.
- The door is extremely heavy or oversized (commercial doors).
Conclusion
Installing new garage door springs is a job that demands respect. While it is a manageable project for a well-equipped and cautious homeowner, the margin for error is slim. We've seen many "simple" DIY repairs turn into costly emergency calls because of a slipped bar or an incorrectly sized spring.
At Regal Garage Doors, we pride ourselves on our local expertise and code-compliant installations. Whether you are in Harrisonburg, Waynesboro, or Charlottesville, we offer transparent quotes and the peace of mind that comes with professional warranties. If you've looked at your broken spring and decided it's a bit too much to handle, we’re here to help.
For professional assistance or to schedule a safety inspection, consider our garage door installation in Waynesboro VA services. We’ll get your door balanced, lubricated, and running smoothly so you can get back to your day—safely.